What is a "birds-eye view" in photography?
When you photograph your subject or objects from above... as if you are a bird flying over.
What is a "still life"?
A still life is a work of art depicting mostly inanimate subject matter, typically commonplace objects which are either natural or man-made. Most of the time a "still-life" is done from "direct observation" - meaning you are studying the objects in front of you - not from a photograph. We will use photography at this level.
What do you have to do this week?
Create TWO different "themed" still life photographs from a birds-eye view.*
Please edit these photographs to become black and white.
*You will be drawing these items - be careful not to choose items that might be too difficult! Although it is always great to push yourself!
Please edit these photographs to become black and white.
*You will be drawing these items - be careful not to choose items that might be too difficult! Although it is always great to push yourself!
Step-by-step guide with photographs:

1. Explore your house. Look for collections of objects that could fall into a "theme". Such as silverware, makeup, tools or candy.
I found a bunch of scissors and metal objects for my black and white image & I chose my daughter's wooden ice cream toys for my color photograph.
|
2. Find a window to photograph near. Place the objects on the floor. See where my objects are compared to the window? While photographing I was on either side of the objects so that the paper was horizontal and the window was to my side. 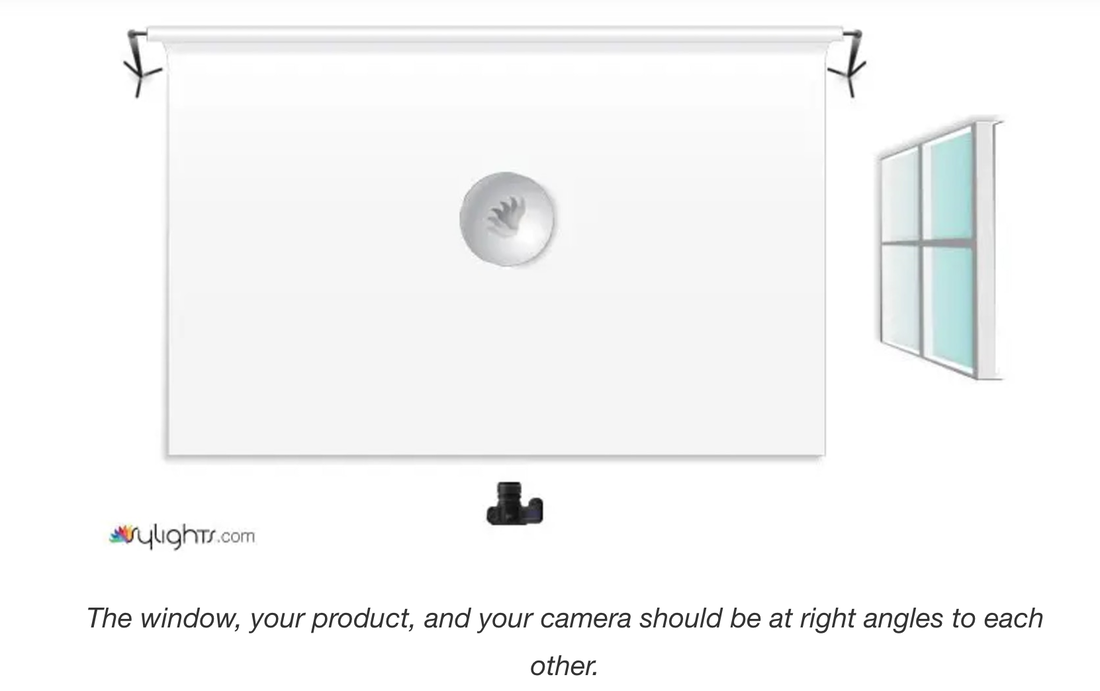
|

|
3. Place a piece of paper on the floor. Any light color can work. Cardboard or fabric can work as well. I chose plain white paper for my photographs. Depending on your objects a black or gray background can work too. Your goal is to create interesting shadows by using the light from the window.

4. Arrange your objects on your paper. Allow objects to "enter and exit" the page (see below for an example).
Take photos from above. Rotate yourself around the set-up and re-arrange objects on the paper to create an interesting composition.
Edit your best photograph to become a black & white image. You can do this by eliminating the "saturation" and adjusting the brightness & contrast. Or you can use Instagram.
Crop your photograph to eliminate the floor around the paper.


5. Arrange your second combination of objects. Take photos from above. Rotate yourself around the set-up and re-arrange objects on the paper to create an interesting composition.
Allow parts of the objects to go off the page. These will be cropped out. You can experiment with pattern and repetition.
Edit your photographs and again change your photographs to black and white.
Allow parts of the objects to go off the page. These will be cropped out. You can experiment with pattern and repetition.
Edit your photographs and again change your photographs to black and white.


6. Choose your best photograph from each theme, edited to the best of your ability, and upload these to google classroom under the correct assignment. My favorite two photographs can be seen below - although I left one in color.

7. We will begin preparing ourselves to draw one of these for our first 1st quarter work of art.
